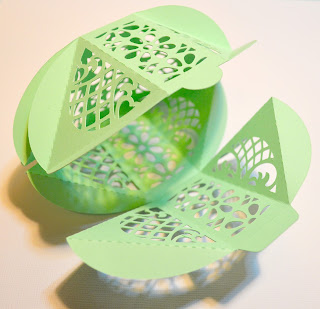
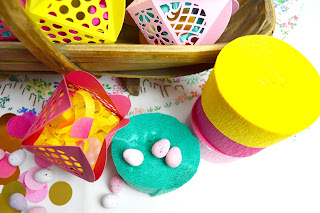
I had a blast making these and managed to scoff quite a few chocolate eggs in the process HA!
These will make lovely gifts for the children but would also be great for adults too.
What you will need:
- coloured card
- wet glue
- items to fill it with, I used crepe paper, mini chocolate eggs and pink/gold confetti pieces.
These are the designs I used:
I wanted to fit two on a page so I did just that, making the eggs as large as possible. Here's a picture with the but setting I used too:
These did take quite a while to cut, I would say about 10 mins per cut. I did for pages and interchanged the colour of card and the patterns so I would end up with a lovely mix.
Now I have to include this next photo because I loved the patterns left on the mat when I had removed my shapes! Gorgeous...
I started by bending inwards along the dashed cut line...
Then went on to bend out the outer rim...
Next I folded in the shape to it made the egg shape...
I folded in the little tab on the right side of the above picture and tucked it in to the other little semi circle small tab, there is a pre cut slit ready for this.
I used wet glue to stick the outer sections of the egg - take care to make sure that it is the bottom of the egg (the pattern is more rounded and shallow, you will be able to tell).
Then your egg will stand up on it's own YAY!
Now to fill it up!
I used crepe paper that I folded up and then chopped in to strips...
Place the strips of crepe paper in the bottom of the egg, like a nest, on top I put my chocolate mini eggs, then another layer of crepe paper. Finally a sprinkle of large confetti pieces in pink and gold for a little razzle dazzle! Finally glue the top together in the same way you did before and that's it. So simple but will make a different treat for anyone on Easter Day.
Here are quite a few pictures of the eggs showing the variety of colours and designs...
I hope you've enjoyed this tutorial and please leave a comment, it's great to hear from you all. I'll be back soon with some more tutorials for you.
C x


These look so lovely...TFS!!
ReplyDeleteHiiiii thank you, so glad you like them C x
DeleteThey are fab! I think I will make some as teacher gifts x
ReplyDeleteThey would be great as teacher's gifts, you could pop a little tag on for them, C x
DeleteWhat an adorable project, Caroline! Such sweet containers you'd want to keep way beyond Easter. Thanks for the clear and easy-to-follow instructions!
ReplyDelete~ iliana :)
Ah Iliana, thank you, so glad you understood my ramblings HA! C x
DeleteThese are so cute!
ReplyDeleteThanks Michelle C x
DeleteAdorable little eggs and great instructions.
ReplyDeleteHi Beth, glad you could follow them, the eggs are so sweet! C x
DeleteSo pretty! Love to see your work :)
ReplyDeleteAh thank you so much C x
DeleteBrilliant idea and seriously cute!! Love these!!
ReplyDeleteHi Margaret, thank you, I'm trying to resist breaking in to them and eating the chocolate eggs HA! C x
DeleteHi Caroline, what a brilliant idea, must check out the designs in the Silhouette store right now! They would also make pretty table favours or hanging tree decorations if cut out in Christmas coloured card. Thank you for taking the time to share this idea. Judith
ReplyDeleteI'm so glad you like it Judith and yes it would be great for Christmas too! C x
DeleteThis comment has been removed by the author.
ReplyDelete