

Hello, Janet here with a quick and easy gift idea. Kids seem to love gifts with their name on, better still when combined with something else they adore. So, needing a gift in a hurry, I decorated this plain apron for a young friend who has a tiny bit of a car obsession, using a design from the Silhouette Design Store.

The design I chose was from a set from the Silhouette Design Store called Baby Toys Borders Set designed by StudioIlustrado. The designer has loads of similarly sized borders with a rectangular base, any of which would work for this purpose. Just search the store for 'Borders set' and filter by 'Studioilustrado' (note, just one 'L') and it will bring up pages of lovely designs - including tractors, seahorses, and even kitchen sets.
I made a few minor adaptations to the file to incorporate the child's name and make a one-piece decal which makes it super easy to weed and align on a garment (or on a flat hard surface if regular vinyl is used). This would be ideal for anyone new to changing files, or to using heat transfer material.
WHAT YOU'LL NEED
Blank Garment (I used a navy polyester cotton apron for age 3 - 4 years)
Silhouette Flock Heat Transfer Material
Silhouette Universal Hook
Iron or Heat Press
Non-Stick Sheet (silicon sheet or parchment paper)
Downloaded Border File (e.g. #58515)
Downloaded Super Font File (e.g. #80746)
STEP 1: PREPARE THE DESIGN
Work out the size you'd like the decal to be. I decided mine should be about 16 cm across, 12 cm down from the neck edge, with a 5 cm gap either side of the decal. You'd probably want a bigger decal on a larger garment.
Open the file and ungroup it (Object, Ungroup). You may need to repeat this until each design displays like this when they are selected.
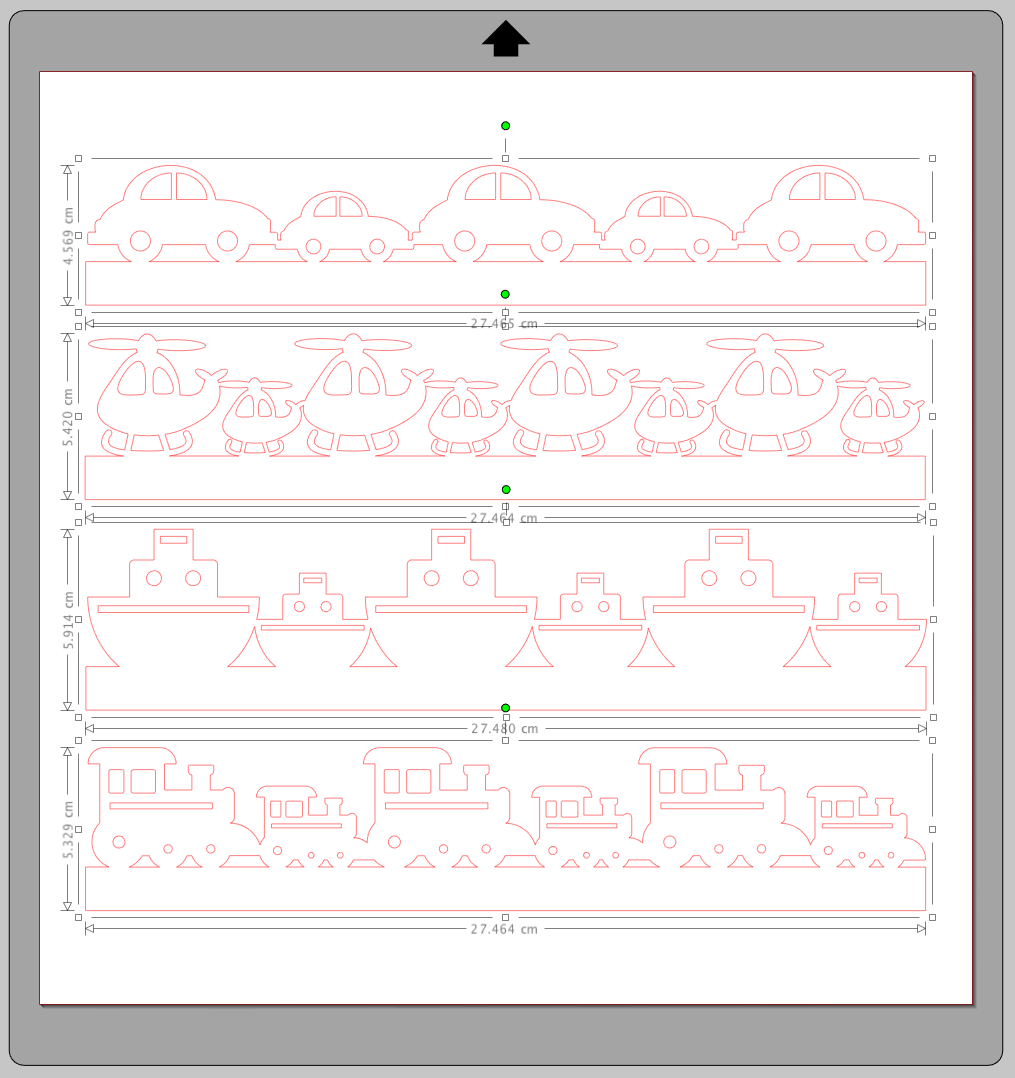
Delete the designs that you won't be using or move them aside.

Reduce the size of the design proportionately by holding down Shift on the keyboard and clicking with the mouse on one of the small squares. Drag it towards the centre of the design until the width measurement is around 16 cm.
Click on the Edit Points Icon and a number of grey squares will appear around the design.

Holding down Shift on the keyboard, select the two lowest grey squares. Continue to hold Shift whilst moving the squares downward using the down directional arrow button on your keyboard. This will re-size just the lower rectangular part and not the remainder of the design.

Click on the Text icon and type the required name. While the text is highlighted (blue), select a bold style of font from the drop down list (I used LW Super).

Place the text in the design and adjust size and character spacing until it looks balanced. Adjust the size of the rectangle using the Edit Points function again if necessary. If you wish to fine tune the spacing between the letters, ungroup the text and move individual letters (often 'A' and 'Y' need such adjustment).

Select everything and group it. Move it to the top of the mat to match where you will place the vinyl on the cutting mat and reverse the design (Select, Object, Mirror, Flip Horizontally).
Select it again and click the Cut icon. Select the Heat Transfer Material Flocked setting and the correct blade.
STEP 2: CUT THE DESIGN
Position the Transfer Material onto a cutting mat with the shiny surface toward the mat. Carry out a test cut if you haven't cut this media before. I used a scrap and so I used a piece of painter's tape to secure the media to the mat. Send to Silhouette to cut.

STEP 3: WEEDING THE DESIGN
Remove the media from the mat and trim around the design. Remove all the excess material from around the design and the interior waste using a weeding tool.


STEP 4: PRESS THE DESIGN
Position the design on the garment with the backing face up. The writing should read correctly. Place a non-stick sheet over the top and press with iron or heat press according to the instructions on the packaging and peel off the backing sheet (shiny). Further hints and tips on applying the flock can be found in my tutorial Christmas Santa Sacks (Applying HTV to Rough Surfaces).


There you have it - add a matching gift tag and your gift is ready.

Of course, the same personalised design (not reversed) can be used on hard surfaces using regular vinyl, so you could make some more co-ordinating items too.
I hope you'll try this out.
Bye for now,

DESIGNS USED:
 |
 |
 |
PRODUCTS USED:
 |
 |
 |
 |
 |
No comments:
Post a Comment