
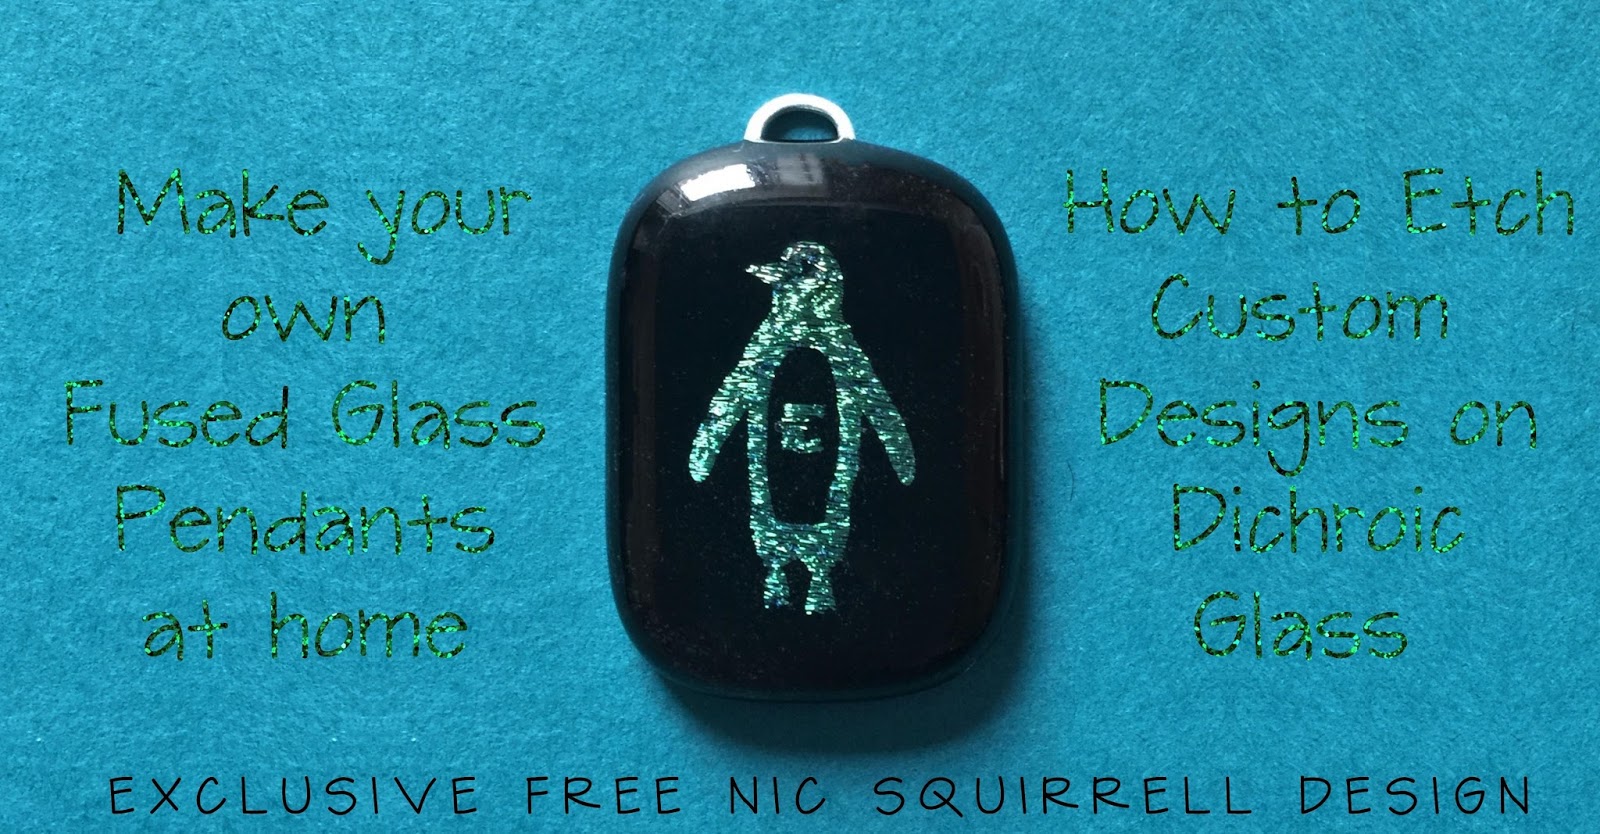
This tutorial comes to you from a cosy spot in front of a blazing wood-burning stove in the French country side. I'm on a blissful week long holiday jewellery making and today I learnt how to make my own custom etched dischroic glass. I decided to use our exclusive free design by Nic Squirrell to make a fused glass pendant for my friend's daughter Eilidh.
I couldn't believe that it's possible to fuse glass at home without a large and very expensive kiln, but my teacher Karen showed me now with a nifty microwave kiln!
What is Dichroic Glass?
Dichroic glass is plain glass, usually black or clear, that has a special film on top. The film recreates shimmering, decorative colour-shifting effects on glass. There are many different options, the one I used had a black base, with a petrol coloured coating.The special film can be etched away in places to create pretty designs. We will use the vinyl to protect the film, so anything covered by it will remain pretty and sparkly, whereas the areas that aren't covered will be eaten away by the etching cream to reveal the plain black glass.

What you’ll need
- Silhouette
- Free Cut File – Download here
- Glass etching cream
- Vinyl
- Dichroic Glass
- Plain glass
- Kiln (or microwave kiln)
STEP ONE: Cut or buy Pre Cut Glass
Fused glass wants to be 6mm thick, so if you stack your piece to only 5mm, it will shrink inwards and similarly 8mm will flatten outwards. If your glass starts out 6mm thick, it should stay roughly the same size.Cut a 2mm thick dichroic glass to your desired size, mine was 2.5cm by 3.5cm. Cut a clear glass top and also bottom, in the same 2mm thickness. It's good to make the top slightly larger, so it flows smoothly over the edge. Straight lines are super easy to cut with glass cutters, but shapes such as circles or hearts can be bought pre-cut. Always use glass with the same expansion rates for all layers, mine were all CoE90.

STEP TWO: Cut and Weed Vinyl
I resized the penguin to 2.5cm tall and made his tummy a bit smaller. I personalised it with the letter E for Eilidh. I also cut the Circle Flowers Design by Hero Arts.STEP THREE: Apply Vinyl to Dichroic Glass
Clean your glass and transfer the vinyl using transfer tape. Burnish to make sure it is stuck down well on all areas.
STEP FOUR: Apply Etching Cream
Cover the glass with etching cream. Different dichroic colours will vary in time, mine was very fast and completely removed the film in about a minute to reveal the plain black glass on the areas that weren't covered by vinyl.
Remove the cream with a tissue and wash your piece. Carefully remove the vinyl to reveal your etched dichroic design:

STEP FIVE: Layer and Fuse
Layer the dichroic glass between the clear top and bottom pieces and fuse. You can add a fine silver bail for your pendant or alternatively drill a hole afterwards or attach the bail with an epoxy glue.Check out the dinky little microkiln that lets you fuse your pieces in a regular microwave in just a few minutes!!!

FINISHED PRODUCT


Other examples by Karen at La Vidalerie
 |
| Courtesy of La Vidalerie Jewellery |
 |
| Courtesy of La Vidalerie Jewellery |
 |
| Courtesy of La Vidalerie Jewellery |
 |
| Courtesy of La Vidalerie Jewellery |
 |
| Courtesy of La Vidalerie Jewellery |

DESIGNS USED:
 |
 |
PRODUCTS USED:
 |
 |
 |
 |
No comments:
Post a Comment