

Hi! Bev here with my first Christmas project of the year! I hope you enjoy this tutorial on how to make these lovely cutlery pockets which are sure to add a touch of personalised magic to any dinner table on Christmas day.
What you will need:
- Silhouette Cameo/Portrait
- Silhouette Glitter Heat Transfer Vinyl
- Sewing Machine
- Material and coordinating threads
- Pins
- Ruler and tailors chalk
Firstly, open your silhouette studio and begin on a blank page. Import the Christmas Tree design from your library.

Resize as required

Using the replicate tool, make as many copies of this shape as needed. I used 4 as I was making a pocket for each of the members of my household.

Step Two
Using the text feature, create all of the names you would like to cut out of the vinyl.

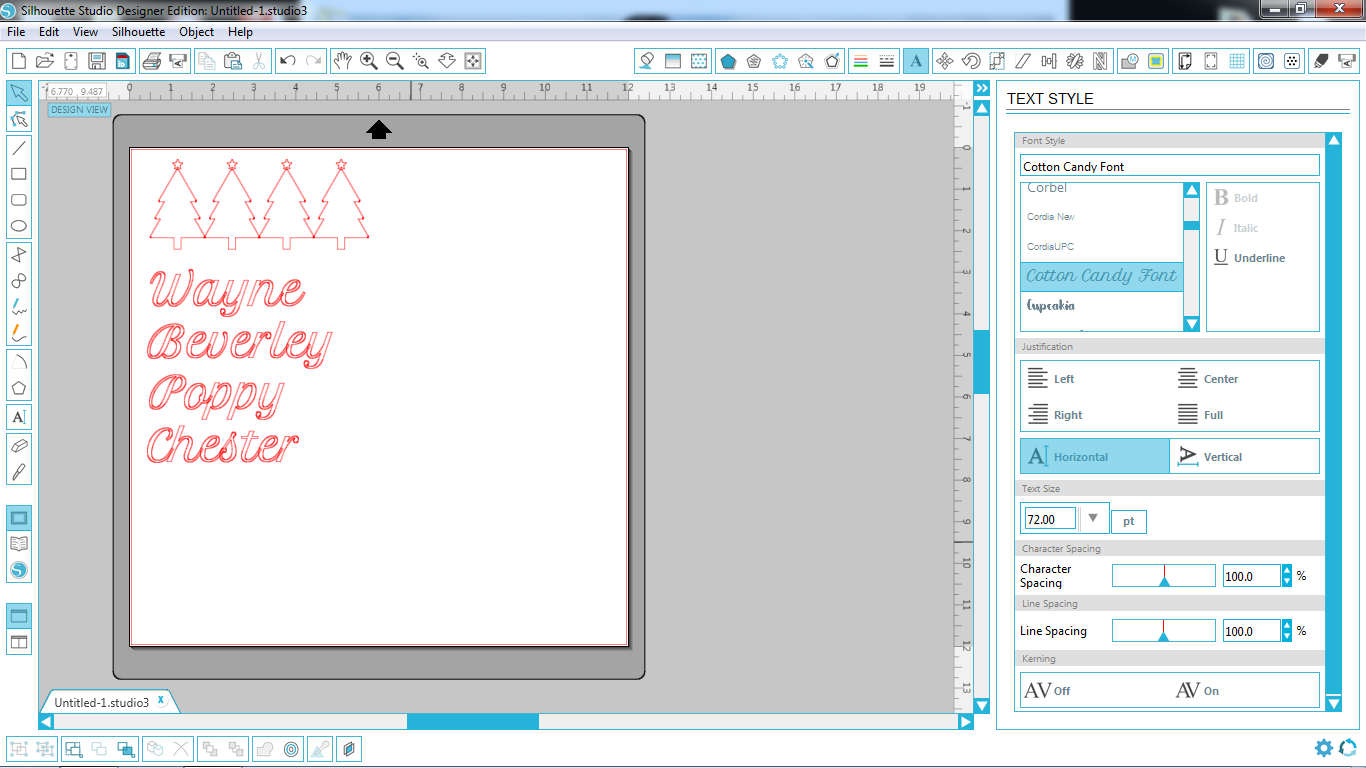
Using the weld tool, select each name and ensure the overlapping letters weld. This will ensure that when you come to cut the lettering, there won't be any cuts in awkward places! Group the letters in the name together by right clicking and selecting group.

Resize as necessary depending on the size of your pockets. I tried to keep all names at approximately 2.5 inches wide.


Step Three
Once your shapes are arranged on the screen (I always arrange them in the way which creates the least waste of vinyl), select the Glitter setting in the cut screen and adjust the blade settings accordingly.


It is important to remember to flip the lettering around so it is mirrored and cuts correctly.


Weed the design and cut into separate pieces. This is one of my favourite parts of working with the HTV. I find it very theraputic seeing the uncut vinyl peeling away and leaving the beautiful shapes and lettering.
Step Four
Prepare your material with iron on interfacing, to ensure that it is a steady medium to work with. Iron on the names in the usual way (very hot iron with no steam, covered with a muslin cloth or non stick mat) and when it has cooled, peel off the plastic.


Cut the material into strips (approx 2in in height and 7in in width). Hem 1cm from the bottom to tidy the edge.


Next, use a different patterned fabric and cut a square 6.5 inches by 6inches and with attach the name strip to the large square by folding over the top.


Fold the material right sides together and sew down the long edge. Ensuring the seam is at the back of the pocket, sew along the bottom to close the remaining edge and turn inside out.


Add the Christmas tree motif as you did the lettering and then the pocket is complete!


I hope you enjoyed this tutorial and I look forward to sharing with you again soon!

Christmas Tree by Simple Stories Design ID#70164
Font - Cotton Candy
Products Used
PRODUCTS USED:
 |
 |
 |
 |
 |
No comments:
Post a Comment