Hello, Karen here. I love making double slider cards as they are kind of magical when you pull one side and something pops out of the other side too.
I wanted to make a special card form my mum's birthday and decided on a double slider card.
You will need:
Silhouette Cameo/Portrait
Printer
Silhouette Cameo/Portrait
Printer
6in square white card blank
Pink glitter card
3 sheets of white A4 card
Foam dots
A plastic bag
Red double sided tape.
STEP 1 - Making Your Components.
- The design I chose was made to be used for planner stickers and so I had to enlarge it for my card.
- I opened the design and chose CROP from the MODIFY menu and this separated all the elements on the page.
- Next I deleted the ones I didn't want, leaving me with three printed panels and a circle.
- I used the DUPLICATE RIGHT option from the REPLICATE menu to mirror the panel with the white background. Then grouped the two parts.
- I rotated the other two panels 90 degrees and resized all three to 4ins wide and 3 ins tall. I also resized the circle to 1 inch wide and 1 in tall.
- On the two panels with the large flowers I drew a rectangle measuring 3.75 wide and 2.75 tall. Changed it's cut settings to NO CUT under the CUT SETTINGS menu. Then I filled this rectangle with white and changed the transparancy to 50% under the ADVANCED options in the FILL COLOUR menu. I then wrote my greeting on one and my verse on the other, remembering to set the text to NO CUT.
- I duplicated my circle and drew a straight line through one of them so that it would be cut in half and used the OFFSET option to make a 0.05 border around the shapes.
- The final element to prepare for printing is my sentiment. Again I changed the line to NO CUT as I wanted to print the words and filled them with pink. I added an offset border and my printed elements were ready to print.
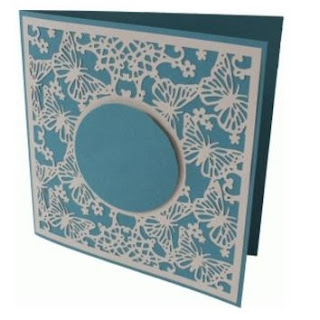
- I then resized my butterfly background to 6 ins square and cut this from white card.
- To make the 'pocket' that the panels pop out of I cut a piece of white card 4.25ins wide and 10.25ins long. I scored this at .5in, 3.75in and 7 ins.
STEP TWO - Constructing Your Slider.
- Now for the fun bit. Cut a piece of plastic bag, long enough to go around the width of your pocket with a little overlap. wrap around the top of your pocket piece and secure with a piece of double sided tape. Make sure that the tape is on the left of your pocket.
- Secure the printed panel, with the sebtunebt on, with a small piece of tape attached to the left side of the plastic loop, printed side up.
- Turn your pocket over - keeping the plastic loop at the top and attach the printed panel, with the verse onto the left side of the plastic loop, printed side down.
- Now fold your pocket around the panels so that they are completely encased and use the .5 in fold to secure.
- Adhere the two printed half circles to the centre of the right panel - this is used to pull the sliders out and push them back again.
- Add the final printed panel to the front of the pocket.
STEP THREE - Constructing Your Card.
- Lay your card so that it opens from bottom to top and on the front score across at 3 ins from the bottom. Fold this to make an easel card using the final printed circle as the stopper.
- Cut a piece of glitter card measuring 6 ins square and adhere the butterfly panel on top of this.
- Attach the slider pocket to the middle of the butterfly panel and place your 'Happy Birthday' sentiment centrally onto this.
- Finally adhere the whole 6 in panel to the bottom only, of the front of your folded card.


PRODUCTS USED:
 |


Amazing card and I love how you used a sticker design in a new way!
ReplyDeletewhat is sebtunebt and where do we get it from? (sorry if I sound a bit thick but I am new to all this)
ReplyDeleteThis comment has been removed by the author.
ReplyDeleteI think KAREN meant to write the word "sentiment" to identify which piece of card she was sticking down.
Delete